classroom rules and management
Schedules, Jobs, Noise Level, Behavior Management & Attention Grabbers
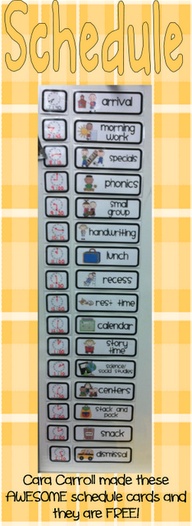
Schedules


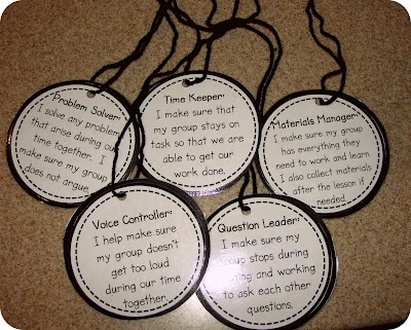
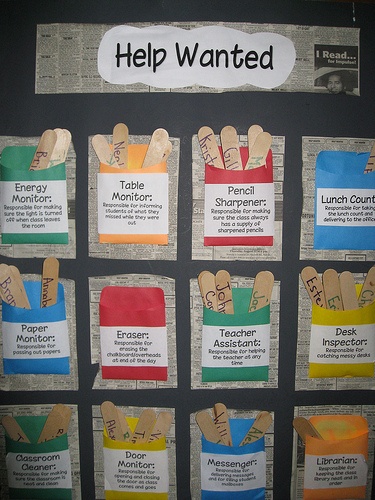
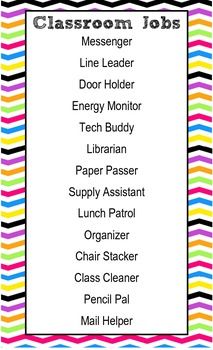
classroom jobs
Classroom Noise Control
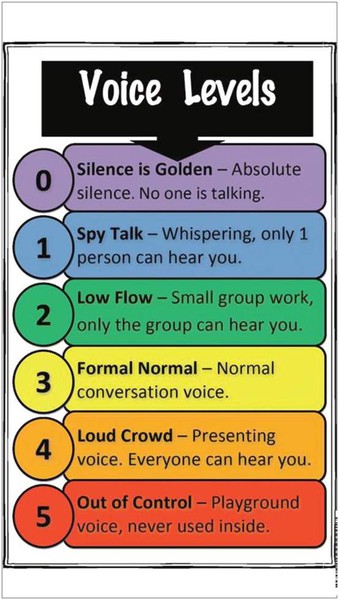
voice levels
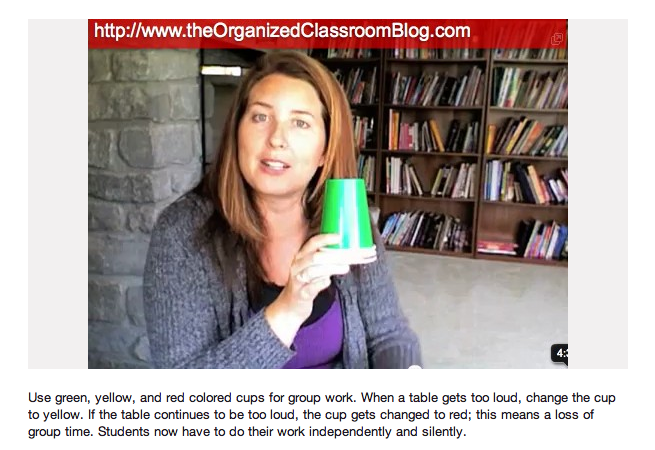
noise level indicators
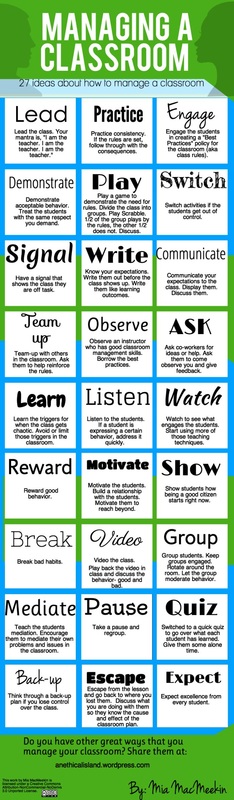
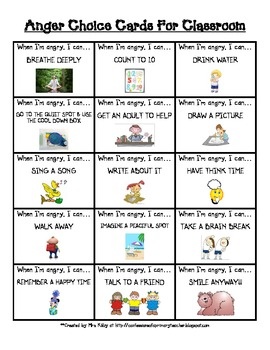
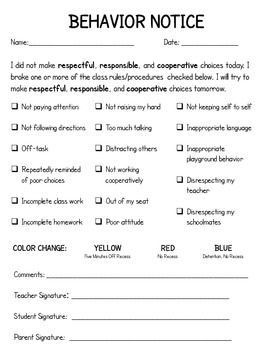
Behavior Management
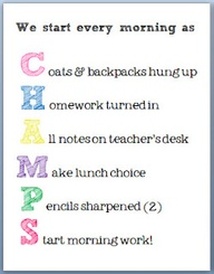
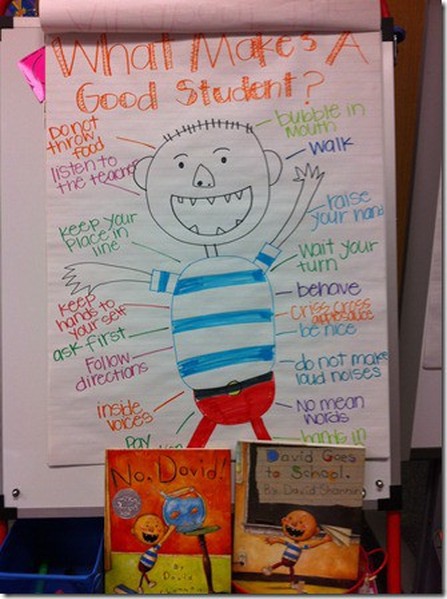
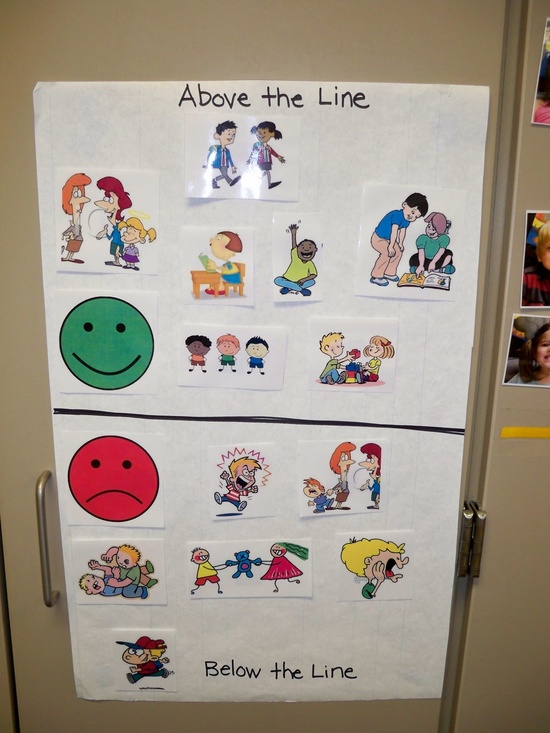
MOdeling Good Student Behavior
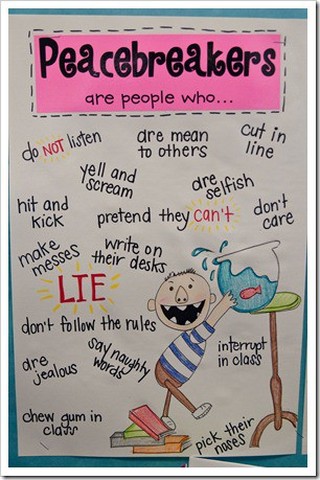
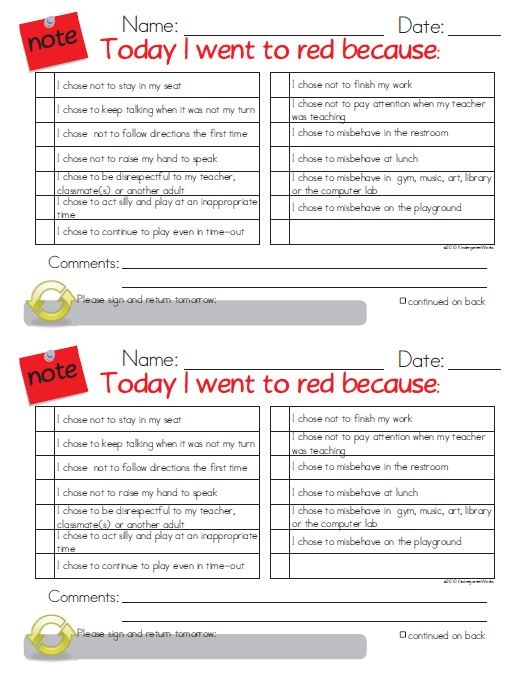
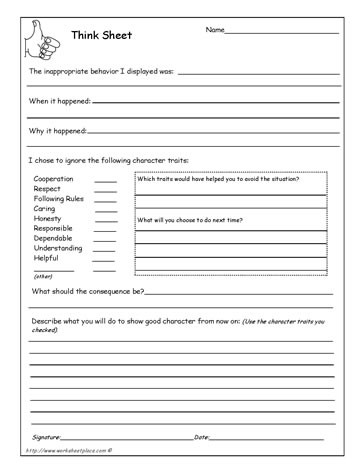
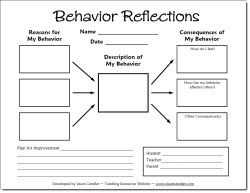
Highlight Bad Behavior
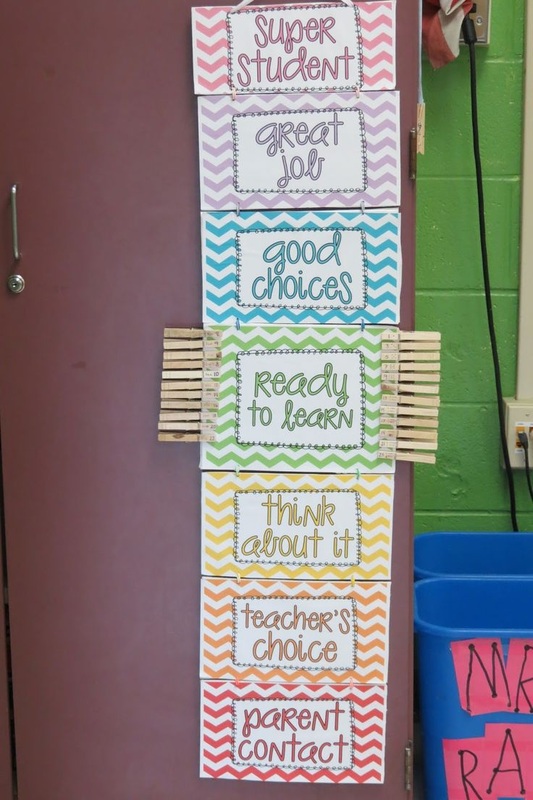
The "Mini Clip Chart"
by: Miss A's Kindergarten
Last summer, it was all the rage on teacher blogs to use a clip chart for behavior management. There were so many options and colors and themes, and I was on board. I even made my own that I wanted to use! (Click here if you would like to see it.) I appreciated the concept of moving the clothespins up and down the chart depending on behavior, and I liked that students can improve and clip back up.
The only concern that I had was that the whole class was able to see it from everywhere in the room. Also, if parent volunteers came in, they would be able to see certain students always toward the bottom of the chart. I wanted a more positive learning environment where students were not ashamed of their behavior, but took ownership of their mistakes.
I started off the school year with whole group management. I had a small, plastic container and some river rocks. Whenever I caught someone being good, I added a rock to our collection. If the class was not following the rules, a rock came out. It worked very well at the beginning of the year! We filled that jar up and got to have extra recess. :) Fun!
Towards October, I realized we needed a little more...motivation. I really wanted to have a clip chart because I could see some students who needed the individual behavior plan, but I couldn't think of a way to do it so that it was not a page or chart on the wall. After much brainstorming came the idea of a miniature clip chart.
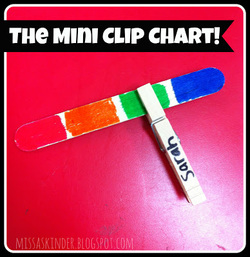
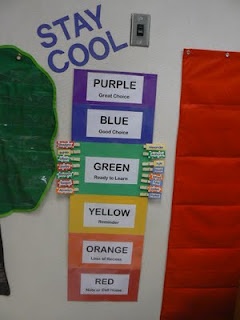
As you can see, it's a much smaller version of the clip chart! I used the four colors red, orange, green, and blue. Here's what they mean:
All you need is a large craft stick, some markers, and a clothespin.
First, I labeled the clothespins with my students' names. I also put their name on the craft stick so that they can be sure to keep track of both pieces. Next comes the messy part. Word of caution: Your hands will get marker on them. We're teachers, so we're used to messy hands, right!? Get the four colors you want to use and hold the very end of the craft stick. Start coloring the stick with the magic marker in small rectangles with each color.
Yes, the color will stay on.
Yes, it will dry.
And yes, the color will come off the stick if it comes in contact with water. Believe me.
That's it!
I did not need to use treasure box or follow-up incentives for this tool (mainly because I didn't have ideas on how to manage that). I loved that it sat at each child's table instead of in plain view on the wall. I believe it really made our classroom more positive because they really had the chance to move back up when they made good choices. I didn't ever hear, "Robert is ALWAYS on red!!" :) I count that as a success.
If you have any ideas on how to extend this tool to make it more interesting, please let me know in the comments!
by: Miss A's Kindergarten
Last summer, it was all the rage on teacher blogs to use a clip chart for behavior management. There were so many options and colors and themes, and I was on board. I even made my own that I wanted to use! (Click here if you would like to see it.) I appreciated the concept of moving the clothespins up and down the chart depending on behavior, and I liked that students can improve and clip back up.
The only concern that I had was that the whole class was able to see it from everywhere in the room. Also, if parent volunteers came in, they would be able to see certain students always toward the bottom of the chart. I wanted a more positive learning environment where students were not ashamed of their behavior, but took ownership of their mistakes.
I started off the school year with whole group management. I had a small, plastic container and some river rocks. Whenever I caught someone being good, I added a rock to our collection. If the class was not following the rules, a rock came out. It worked very well at the beginning of the year! We filled that jar up and got to have extra recess. :) Fun!
Towards October, I realized we needed a little more...motivation. I really wanted to have a clip chart because I could see some students who needed the individual behavior plan, but I couldn't think of a way to do it so that it was not a page or chart on the wall. After much brainstorming came the idea of a miniature clip chart.
As you can see, it's a much smaller version of the clip chart! I used the four colors red, orange, green, and blue. Here's what they mean:
- Red means teacher's choice. It means parent contact of some sort, whether it's a phone call, office visit, or just an email. The child may not move the clip back up if it gets to red.
- Orange is a warning. The students can move up from orange. There will be lots of movement between green and orange (hopefully!). If a child asks to move back up, they are not allowed to move back up yet. I have to actually see the students making good choices, not just begging for green.
- Green means ready to learn. The students start their day off at green. I have them change their clip back to green at the end of the day so that we can start fresh the next day.
- Blue means the child is making super choices! If you see that child who is staying on task, working hard, and helping others, move him or her up to blue! You can even find a way to reward that behavior. (Such as a positive note home, a positive phone call, etc.)
All you need is a large craft stick, some markers, and a clothespin.
First, I labeled the clothespins with my students' names. I also put their name on the craft stick so that they can be sure to keep track of both pieces. Next comes the messy part. Word of caution: Your hands will get marker on them. We're teachers, so we're used to messy hands, right!? Get the four colors you want to use and hold the very end of the craft stick. Start coloring the stick with the magic marker in small rectangles with each color.
Yes, the color will stay on.
Yes, it will dry.
And yes, the color will come off the stick if it comes in contact with water. Believe me.
That's it!
I did not need to use treasure box or follow-up incentives for this tool (mainly because I didn't have ideas on how to manage that). I loved that it sat at each child's table instead of in plain view on the wall. I believe it really made our classroom more positive because they really had the chance to move back up when they made good choices. I didn't ever hear, "Robert is ALWAYS on red!!" :) I count that as a success.
If you have any ideas on how to extend this tool to make it more interesting, please let me know in the comments!
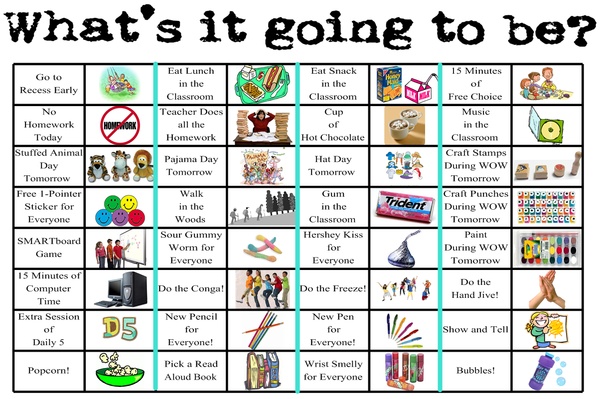
rewards, chosen by students

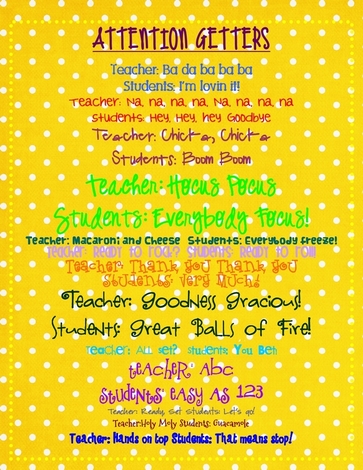
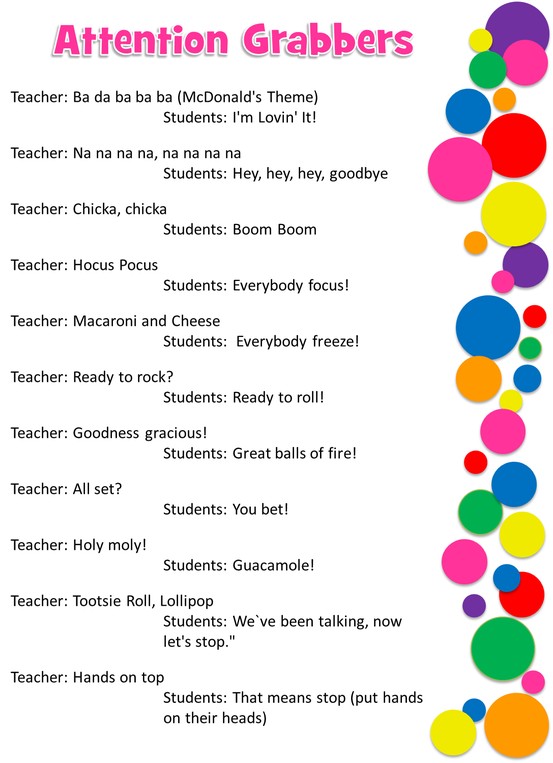
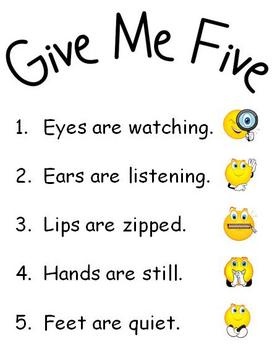
Maintaining Student Attention
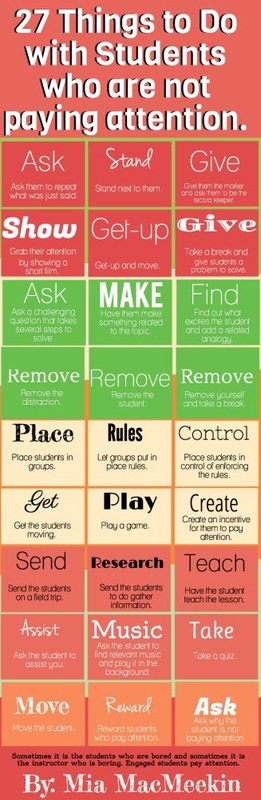
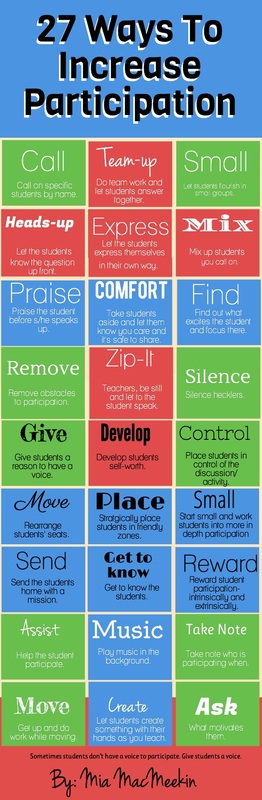
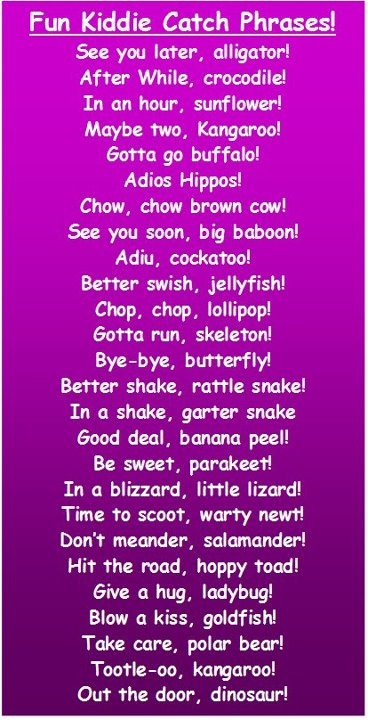
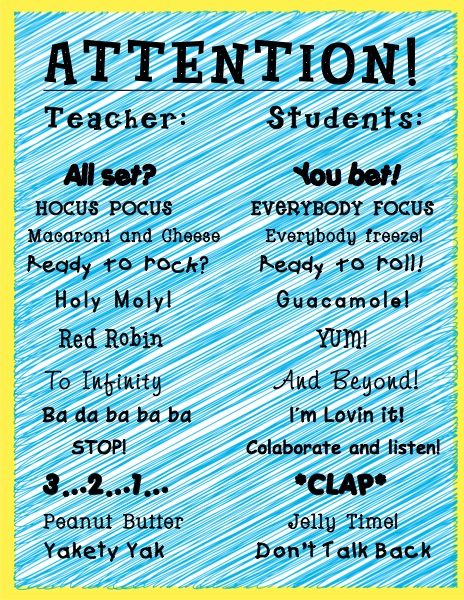
Attention grabbers for students